 Frequently Asked Questions
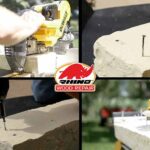 Videos
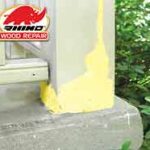 Colourful Chemist cooks up wood-repair product
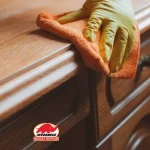 Custom Adhesive Epoxies & Formulations
 THE SIMPLE SOLUTION TO A DIFFICULT PROBLEM.
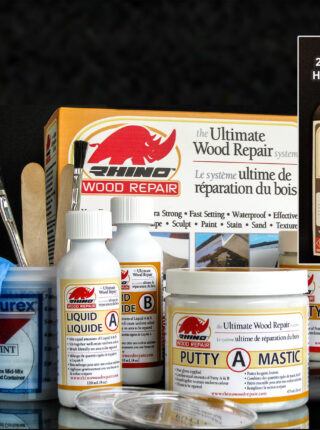
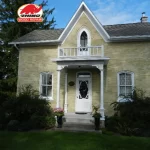
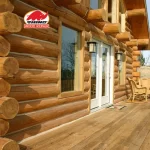 Rhino Wood Repair for Log Homes Looking to combat wood rot on your log home? Enter Rhino Wood Repair — the vanguard of wood restoration, with a legacy spanning over three decades. Led by Robin Pixner, a visionary in the field of wood preservation, our mission is simple yet profound: to breathe new life into aging wood, to fortify its strength, and to ensure that the legacy of log homes endures for generations to come.
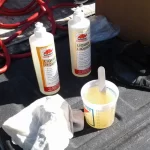 Wood Epoxy
Frequently Asked Questions
How do I use Rhino PreTreat product?
In the initial stage starts with all wood rot and decay needing to be removed before application of Rhino PreTreat. Next, ensure wood is wet to open pores, then add Rhino PreTreat, wait an hour, then apply a second time. Leave time to dry (more time should be allocated to dry based on how big the repair job is). Mix and pour liquid A and B and while that is wet, add wood putty to finish.
Should I apply a couple applications of the Rhino PreTreat?
Yes, apply a coat and let it sit for an hour, then add the next and allow to dry before doing an actual repair. It usually depends on the environmental condition during the application.
What is the purpose of the Rhino PreTreat product?
Rhino PreTreat is formulated with effective active ingredients that penetrate deep into the wood fibres, enhancing its structural integrity and prolonging its lifespan. It contains adhesion promoters that draw in the mixed liquid A & B epoxy deeper into the wood. When applying coatings, it will draw any clear to opaque coatings deeper in to your wood. It stabilizes the wood ph levels, which extends the life of the wood.
When applying PreTreat, does the decayed/damaged area have to be dry?
Yes. The area has to be completely dry and free of water and moisture.
What temperature is recommended to use the liquid A and Liquid B product?
It is recommended to use product when temperatures are above 13°C (55°F). Liquid A and B should be at room temperature.
How do I prepare the wood surface?
Scrape away loose paint/stain with a scraper. Sand if necessary. Remove any decayed or damaged wood. Remove any grease, oil, dirt or other debris from area to be repaired. If necessary drill additional 3/8” or 1/2” holes a couple of inches from area to be repaired to apply additional Rhino PreTreat product. Ensure area is dry and clean before actual repair (at least 24 hours).
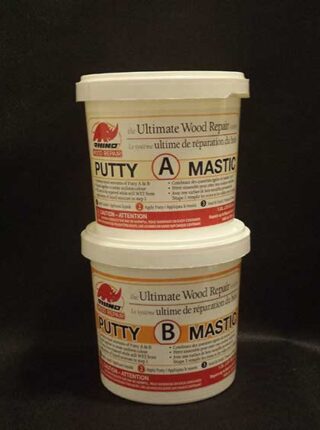
Do I wait until mixed liquid is hard before I fill repair with putty?
The putty needs to be applied to the mixed wet surface. If it hardens before you put the putty, re-apply the liquid A&B and then putty.
Do I need to add more than one coating of mixed liquid to the damaged wood area?
If you have missed or if you are unable to take out all of the damaged wood, the remaining damaged wood will aggressively absorb the mixed liquid. It may be required to add second coating of mixed liquid. We recommend you wait 5-20 minutes before applying another coating to ensure surface is wet for adhesion to putty.
How long does it take for Rhino Wood Repair products to dry and cure?
The drying and curing times for Rhino Wood Repair products may vary depending on factors such as temperature, humidity, and the type of product used. In general, products like wood filler and epoxy resin may take several hours to dry completely, while sealants and finishes may require additional time to cure. Always refer to the product instructions for specific drying and curing guidelines.
Can Rhino Wood Repair products be used by homeowners for DIY heritage restoration projects?
Yes, Rhino Wood Repair products are suitable for both professional restoration experts and homeowners undertaking DIY projects. Our products are designed for ease of use, allowing individuals to achieve professional-quality results with minimal effort. Whether you’re restoring a family heirloom or preserving a historic structure, Rhino Wood Repair products offer reliable solutions for heritage restoration.
Are Rhino Wood Repair products safe to use on delicate wood surfaces?
Yes, Rhino Wood Repair products are designed to be safe and effective for use on a variety of wood surfaces, including delicate wood. Our formulations are carefully crafted to ensure compatibility with different types of wood and finishes, providing reliable restoration without compromising the integrity of the wood.
How do you keep wood logs from rotting?
Prevent wood rot through proactive maintenance measures, including regular inspections, proper ventilation, and timely repairs. Additionally, applying Rhino PreTreat serves as a proactive step to shield your wood logs from moisture, pests, and decay, effectively prolonging their lifespan and beauty.
What is the best product to combat wood rot?
Combat wood rot effectively with Rhino Wood Repair’s Liquid Restoration solution. Formulated to penetrate deep into the wood fibers, our advanced formula attempts to delay fungal growth while reinforcing structural integrity, ensuring lasting protection against wood rot.
How to use Rhino Wood Repair Products
About the Rhino Wood Repair Process
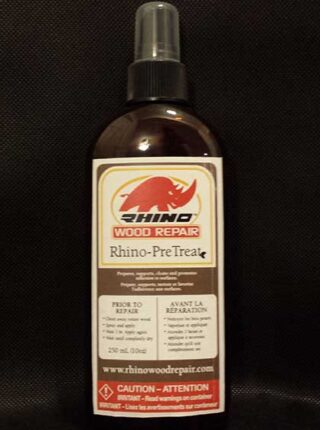
Rhino PreTreat
Harnessing the power of advanced chemistry, Rhino PreTreat stands as the first line of defense against moisture, pests, and rotting. Applied prior to restoration, this potent formula penetrates deep into the wood fibers, creating a barrier that fortifies against the ravages of time.
Liquid Restoration
Witness the transformative power of liquid Restoration as it breathes new life into weathered wood surfaces. Designed to fight rot, decay, and structural weaknesses, this versatile solution revitalizes your log home with precision and ease.
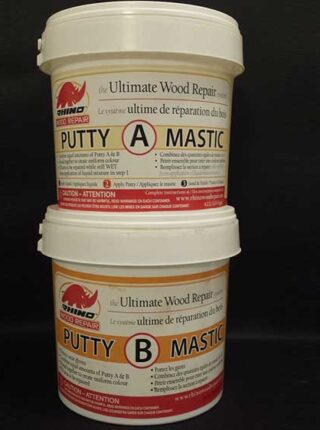
RWR Putty
Achieve seamless repairs with Rhino Wood Repair Putty. Crafted with precision and durability in mind, our RWR putty seamlessly blends with existing wood surfaces, filling gaps and restoring structural integrity with unmatched precision.
Top Related Products
Related products
-
Sale!
4.2L Bulk Putty
Original price was: $549.95.$479.04Current price is: $479.04. Add to cart -
Sale!
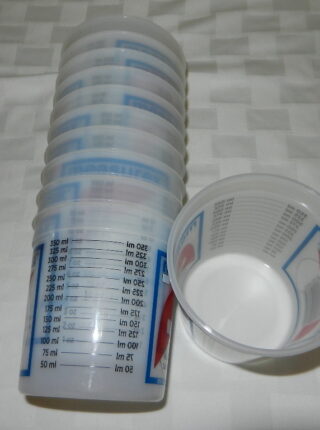
400ml graduated measuring cups
Original price was: $2.45.$1.30Current price is: $1.30. Add to cart -
Sale!
Rhino Wood Repair Rhino PreTreat 250 ml Liquid
Original price was: $34.95.$26.80Current price is: $26.80. Add to cart -
Sale!

DIY Homeowner Kit
Original price was: $199.00.$136.44Current price is: $136.44. Add to cart
Customer Reviews
David K.
⭐⭐⭐⭐⭐ “I couldn’t be happier with Rhino Wood Repair! Living in Meaford, I needed a reliable solution for my wooden window repairs. Rhino Wood Repair exceeded my expectations with its durability and ease of use. Restored my windows like new!”
Matt M.
⭐⭐⭐⭐⭐ “Rhino Wood Repair is a game-changer! I used their products to restore my wooden windows, and the results were outstanding. Easy application and incredible durability. Highly recommend!”
Michael R.
⭐⭐⭐⭐⭐ “Exceptional product! I repaired the storm-damaged window sills in my house using Rhino Wood Repair. The transformation was remarkable. Sturdy, reliable, and saved me from costly replacements.”